Roles
Follow the guide below to manage roles.
- Sign Into PIMS
- Click On Admin -> Roles. You need to have Roles permissions in place.
View Role
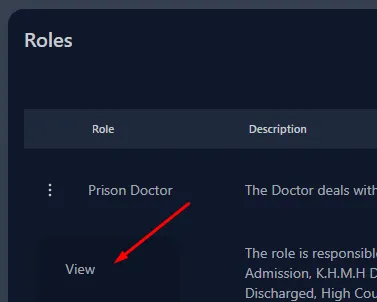
- Click on any active Role, and select View.
- This will open a dialog with the Role overview. This includes the Role’s location, permission and notifications.
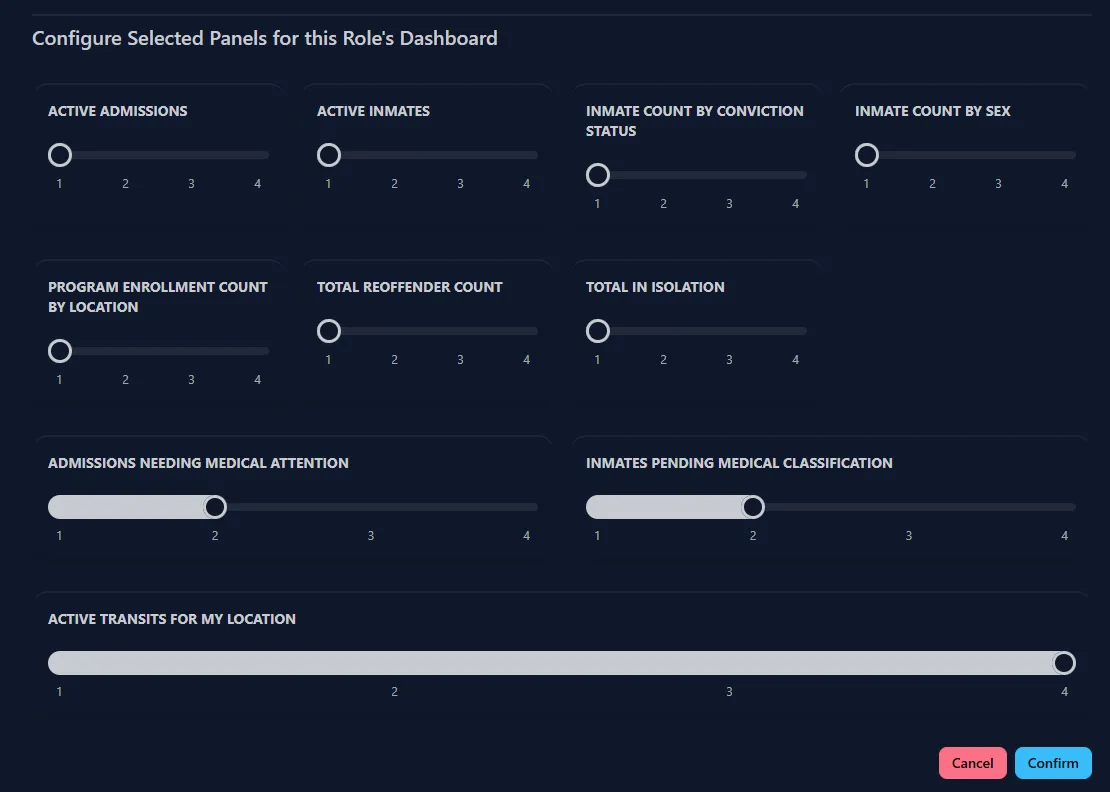
- To view a Role Dashboard, select Dashboard. This will display the Dashboard selected panels. You can edit a dashboard here as well.
Create New Role
- Scroll to the end of the Roles table and click New Role.
- A dialog will become available for you to create the Role.
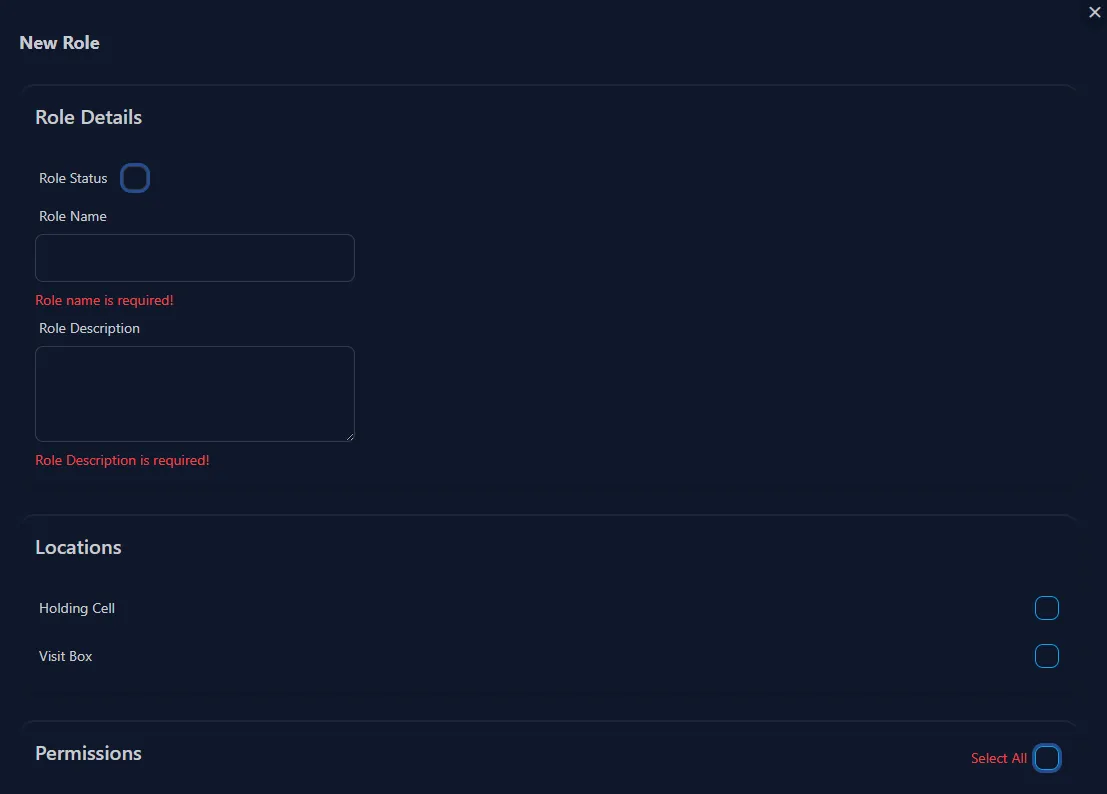
- Role Status must be checked for it to be active.
- Role Name is required.
- Role Description is required.
- Locations: Select all the Locations that the Role should have access to.
- Permissions: Select all permissions that the Role should have. This will determine what the end user can see and do.
- Notifications: Select all the notifications this Role should receive.
- Click Confirm. Role will be created if there are no errors.
Update Role Locations, Permissions and Notifications
- Click on any active Role, and select Edit.
- A dialog similar to creating Role will become available but with all the information populated.
- Make the updates using the checkboxes for each category: Locations, Permissions, and Notifications.
Update Role Dashboard
- Click on any active Role, and select Dashboard.
- The dashboard dialog will present a similar experience where you can enable/disable dashboard panels using checkboxes. It will also show a high level preview of the grid breakdown. You can use the sliders to adjust the grid width per panel.
Further reading
- Read reviewing activity log in PIMS